Main, Photos Everywhere

Top Equipment You Need to Begin a Photography Business

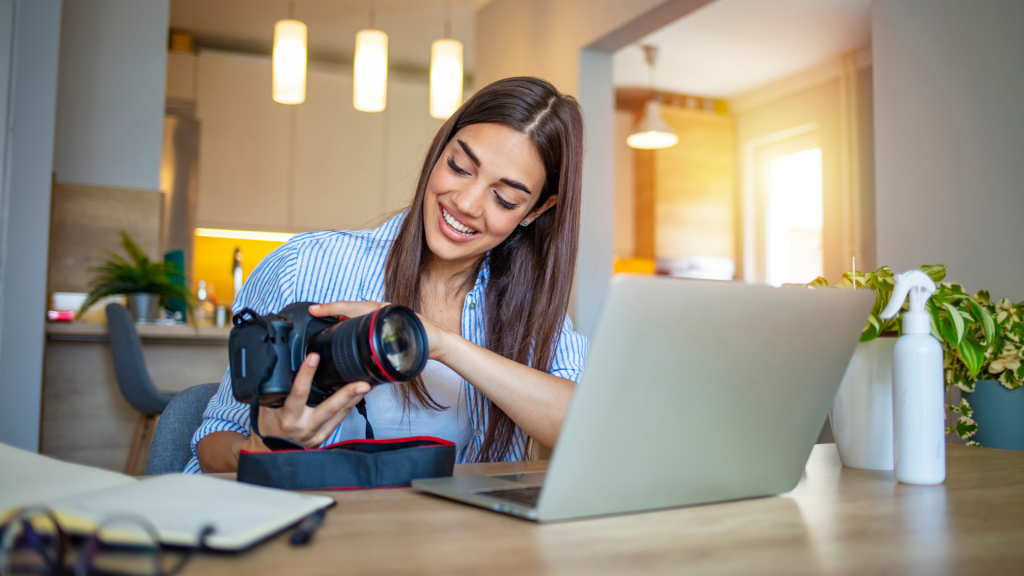
Photography can be an excellent way to make money while pursuing other interests. The good news is that you don’t need to be a professional photographer to start making money right away. Instead, you can launch a small business that primarily focuses on shooting photos.Another advantage of starting a photography business is that many photographers also provide photography services or equipment to other businesses and offer digital prints, albums, and wall art to their clients.

Many people dream of turning their passion for photography into a profitable business but often feel overwhelmed about where to start. In truth, there is a lot involved in launching a photography business. Firstly, you will need a professional website to showcase your portfolio, services, and contact details. Legal and financial services are also essential for obtaining permits, setting up insurance, and ensuring compliance. Moreover, it is vital to maintain accurate financial records, so having a bookkeeping service to track your income and expenses is necessary. And if you are unsure where to find one, you can take a look and learn the right tips on finding a bookkeeper near you here. Additionally, you have to collaborate with a branding service who can help you to establish a strong identity for your business.

Furthermore, you’ll need many necessary pieces of camera equipment (or “gear,” as photographers like to call it) to make your dreams come true. So, before starting a photography business, ensure you have the appropriate equipment to do the work. If you don’t have the required funding for it, don’t worry! You can seek equipment loans florida or elsewhere to have the sufficient amount required to kickstart your photography business. These loans tend to be specifically designed to help aspiring entrepreneurs like you acquire the essential camera gear needed for a successful venture.

Here Is the Top Equipment You Need to Begin a Photography Business:

Tripod

Your camera’s zoom capability is all well and good, but unless you’re willing to take lots of blurry pictures, you’ll frequently find yourself in need of a tripod. The tripod is your camera’s best friend since it allows you to take steady photos without shaking the camera or camera lens. Plus, using a video tripod with your phone’s camera also allows you to take awesome videos.

Lighting

Do you need a lighting kit to begin a photography business? Starting, you may not need a lighting kit quite yet. But consider buying a simple daylight lamp. You won’t need expensive lights until you begin selling your images to larger clients.

Camera Strap

A camera strap is practically a must-have accessory for any photographer. No matter what kind of photography you do, a camera strap can come in handy. For example, if you shoot a lot of outdoor scenes, your strap will come in handy. It helps secure your camera to your shoulder and keeps it from knocking on things. If you shoot portraits, it will help you keep your hands free.

Cleaning Kits

From lens cleaning solutions to a microfiber cloth, a brochure-friendly maintenance kit will help you keep all your photo equipment in tip-top shape. Every professional photographer should be someone who knows how to clean equipment because there are only so many hours in a day, and we never know when the next accident will be.
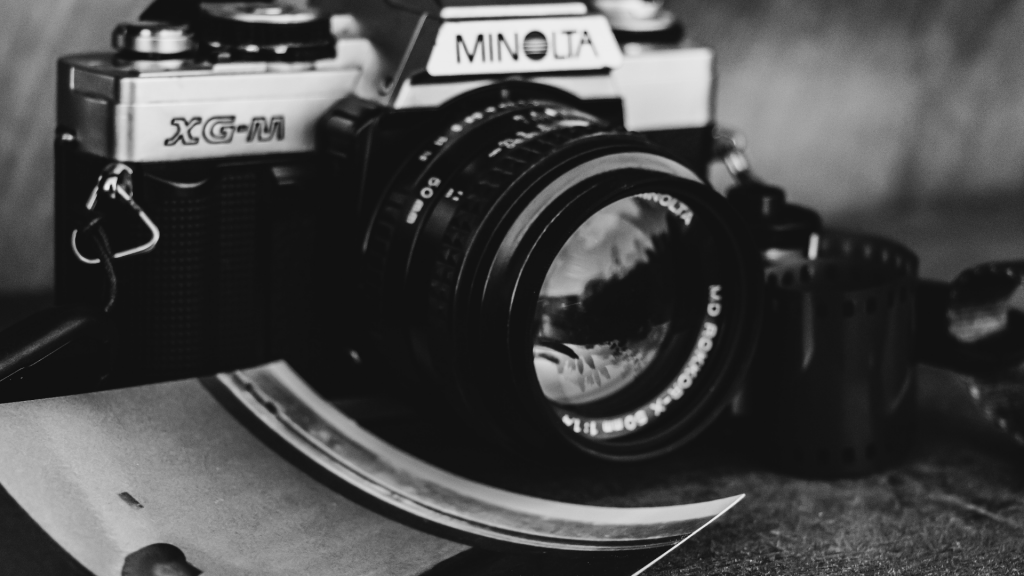
Camera

While it’s not always necessary to invest in an expensive digital SLR, it can make a world of difference in the quality of your images. Keep in mind, however, that entry-level cameras are still quite capable and that when you grow beyond these, you can always upgrade to a better model.

Camera Lenses and Filters

As a photographer, you’ll shoot photos in a wide variety of lighting conditions, from very dark indoors to very sunny outdoors. Since good-quality lenses can greatly improve your photos, be sure to invest in high-quality lens options. Likewise, it would be beneficial to opt for lens filters. Lens filters can play a crucial role in enhancing image quality, adding creative effects, reducing glare, and protecting your lens. Take, for instance, ND filters, which can help photographers achieve balanced exposures, control light, create long exposures, and capture stunning landscape or motion blur shots. Articles at shutterreleaseworld can enlighten you further about this.

Camera Bag

Every photographer needs the right equipment. Professional equipment is important, but even more important is to have the right bag to carry it all. A bag that can carry a camera, lenses, flashes, accessories, a laptop, and a few other items is essential. What type of bag you need depends on you and the type of photography you do.

Memory Cards

Memory cards are one of the most important pieces of equipment for your photography business. When memory cards are full, you won’t be able to take as many photos.

Backdrops

You’ve decided you want to start a photography business, and now that you’ve got your equipment in order, you’re ready to start snapping photos. But before you do that, you’ll need to invest in backdrops. A backdrop is a color or pattern that is placed behind your subject, which gives it a more professional look and feels. Photographers love backdrops. They’re like wallpaper for photos, only more beautiful. They are an instant way to transform any setting into a different location.

Computer

You’ll need a computer to store your photos, and also to process photos.

External Hard Drive

An external hard drive is another essential business tool.

Monitors and Printers

Monitors and printers allow you to display your photos to your clients.

Software for Photographer

You can take your photography business to the next level with some of these photography business essentials. But a must-have for any serious photographer is a software solution like Adobe Creative Cloud Photography Plan, which includes Lightroom CC and Photoshop (both of which are included as part of your Photoshop CC membership), for $9.99 a month.

Photography equipment can be very expensive, but these days there are so many camera-related accessories available on a budget that it doesn’t take much to get started. Some camera stores offer cameras and accessories at very affordable prices, so it’s worthwhile to check them out. Make sure to also buy used equipment since buying new cameras and accessories can eat up a good chunk of your budget.

Main, Songs and Music

6 Best Free Music Production Software for Beginners

Finding the right free music production software for beginners can be difficult. When learning a new skill, beginners often need software that is easy to understand and allows them to start creating music immediately. 

As a beginner in making music, finding the right free software for music production can be a real task. There are many options out there, and it can be easy to be overwhelmed. To help out, we put together this list of 6 of the best free software for music production.

Cakewalk by BandLab

Cakewalk by BandLab is one of the coolest music production apps out there. Cakewalk is a music creation software company, and its flagship music creation software is called BandLab. BandLab is a powerful music creation app that isn’t just for professionals. BandLab is the application that launched the careers of many of today’s top music artists, including Flo Rida, Lady Gaga, and Machine Gun Kelly. Don’t let its big name intimidate you, though; BandLab is free for everyone to use.

Waveform

Music production software can be intimidating. Even the most experienced producer has to start somewhere. Waveform is a music production software for beginners. It’s free and has a very simple interface. You just drag and drop sounds into your project and then adjust their volume, pan, and pitch. Waveform has tons of music samples to choose from, and you’re free to record your own sounds and add them to the software. It’s intuitive and powerful enough that even pros can use it. 

LMMS

LMMS is a free, open-source music production software that lets you create music with little experience. It’s beginner-friendly and has great production values. LMMS got its name from the acronym for “Linux Music Mix & Mastering Station.” However, it’s widely used outside of the Linux community. LMMS is used on professional audio workstations in the professional recording and mixing process.

Audacity 

Audacity is a free, open-source audio editor and recorder, and it’s a fantastic program for learning how to make music. While Audacity isn’t compatible with many iOS devices, you can easily access your computer’s audio through other mobile or desktop programs, such as GarageBand or iTunes. 

DarkWave Studio

DarkWave Studio is a Windows software tool that can help beginners make music. It’s free, but for advanced users, paid versions are available. DarkWave Studio is a free music production software designed for beginners who want to create electronic music. The program’s interface is intuitive and easy to use and comes with several built-in templates. It comes with a built-in sampler, sound library, and effects, and you can even record your own audio files. DarkWave Studio also lets you export your songs to MP3, Ogg Vorbis, and WAV formats, and you can upload them to SoundCloud, Google Drive, Google Drive, and YouTube.

GarageBand

GarageBand is one of the world’s most popular music production apps—and it’s free! The framework for GarageBand is Music Maker Jam, a drag-and-drop app that lets you easily put together music tracks. While GarageBand is as powerful and rich as Apple’s Logic Pro X, it is free and comes with easy tutorials for the basics. Music Maker Jam is available for Windows (PC/Mac), iOS (iPhone/iPad), and Android. It has many of the features and functions of more expensive music production software, including virtual instruments, sample libraries, and effects. And, if you have an iPhone (or iPad), GarageBand can wirelessly sync to your device so you can edit your music on the go.

The music industry is vast, ranging from songwriting to music production. So, if you are an aspiring music producer, then you need to know all the tips and tricks available in the industry. Of course, multiple software is available, but choosing the easiest one might be a tedious task for beginners.

It’s no small accomplishment to be able to create a track. Whether you are an aspiring musician or want to create a playlist for your SoundCloud page, the first step is learning how to use music production software. Free programs such as Audacity are available online, while paid programs start at $0.99 for a trial and go up to hundreds of dollars.

The digital age has made it easier than ever to make music. Recording music was once an expensive, complicated, and time-intensive process—once you figured out how to record, you had to master it and then burn it to CDs and ship them. Today, you can record your music on your laptop, upload it to the cloud, and share it with the world.

Main, Photos Everywhere

How to Start a Photography Business: A Checklist

Starting and owning a photography business can be fun, creative, and addictive. However, as with most new endeavors, it can be scary to start. Photography is an innovative and sometimes unpredictable art form. Still, with the right preparation and a plan, you can establish your business as a success. Below is a checklist to help you start your business.

  1. Choosing a Photography Business Name

When you decide to start a photography business, you need to settle on a name. The name can be an important branding and marketing decision, and it’s something you should explore thoroughly. If you have picked up a couple of names, but aren’t able to finalize one, using Conjointly’s Business Name Evaluator could be helpful in order to find out which name will have the most positive impact. Along with the name, you will also need to choose a structure for your business. In the photography industry, photographers usually have three options in this respect: sole proprietorship, partnership, or corporation. Each option has benefits and drawbacks, so you’ll want to consider which business structure will work best for you carefully.

  1. Decide on the Type of Services That You Offer

Starting a photography business can be more than a hobby. It can be a way to provide your family with a flexible income or a way to serve the community while building your professional portfolio. As with any new business, there are steps to take before getting started, and your business plan will include knowing the types of services you plan to offer.

  1. Hire the right people

If you want to start your own photography business, it’s important to make sure you hire the right group of people. This group should include some photographers with experience in the areas you lack expertise in, a marketing executive who knows where to get your business banner, or which kind of custom decals would most attract the customers as well as professionals good with editing skills.

Remember that there are many inexperienced professionals in the market looking to make a quick buck. So, make sure to shortlist people based on their merit. Evaluate their portfolios and figure out whether their work matches the kind of projects you work on. Apart from that, you should understand that there is a risk of hiring fraudsters. And it could put your work at risk if you make a bad hire. Make a background check and learn about the candidates through companies like Bond Rees ltd, so that you can filter out the best individuals for the job. It goes without saying that hiring the right bunch of people is the first step in ensuring the success of a business.

  1. Know Your Market

Starting a photography business can be simpler than you think, but there are a few things you need to do before you get started. Before laying out your shingle, ensure the market can support your business. Do some research, talk to photographers and other business owners about their business, and don’t be afraid to jump into the photography business.

If photography is your passion, and you want to buy into your own photography business, this may be the perfect opportunity for you. If you want to start a photography business, you will have to know your target market: who you want to serve. You may need to learn about your target market before you begin, but once you’ve determined your services and whom you want to serve, you can move on to other elements.

  1. Have the Right Tools

Photography is a terrific hobby, and it’s great for capturing memories. You need to invest in the right tools to turn this passion into a thriving business. That’s why getting a small business credit card to fund equipment purchases is important.

  1. Create a Online Presence.

Social media is one of the small businesses’ most powerful marketing tools. With social media and online tools, you can blast your business information out to the world, encouraging new and returning customers alike. A business website accompanied by an Instagram account is a great place to start. Make sure the website is well-made using the services of alpha website design or similar companies and acts as a portfolio/exhibition of your best work. You could also have a blog on the website. Blogs provide a platform for you to share advice, helpful tips, and tricks and showcase your work.

If you want to have a successful photography business, a strong social media presence can help you reach a target audience as well as build your brand. There are endless amounts of ways to promote your business on social media. You can create your own blog, post on Instagram, Facebook, Twitter, and Pinterest, or use Pinterest to promote your business. Be creative and do your research so you can come up with the best possible ways to promote your photography business.

  1. Generate leads and market yourself

No matter what industry you are in, personal branding is important. You are more likely to make a sale when you market yourself first. It also increases your credibility. Successful marketing begins with creating informative and eye-catching content. You’ll need a website, a blog, and a social media presence (Facebook, Twitter, Instagram).

Main, Songs and Music

What Are the Different Types of Microphones Used in Recording Studios

Vocal performances have become increasingly impressive as the recording technology of the past few decades has advanced. The improvement of vocal recording and mixing technology has allowed the mastering of the instrument and vocal performances to become much more detailed and lifelike. This advancement has also increased the number of different types of microphones used in recording studios.

When investing in a recording studio, it’s important to know what equipment you need. Depending on what studio you are looking to set up, there are a variety of microphones to consider. Some of the most popular types of microphones include condenser and dynamic, but here we’ll explore these along with some others.

Condenser

Condenser microphones, also known as small diaphragm microphones, are the most common microphones used in broadcasting. They are usually used to record speech but can also be used to record musical instruments and vocals. Condenser microphones have a small diaphragm surrounding the capsule, resulting in more sensitivity than larger diaphragm microphones.

Dynamic

One of the hottest trends in audio at the moment is dynamic microphones, which you might not even know. While they have been used in the studio recording for years, they have recently become popular on personal listening devices and smartphones. Dynamic microphones are recognizable by their lack of moving parts; there are no moving parts inside that vibrate or produce a sound when you speak. Instead, they rely on the laws of physics to create sound through the vibration of air molecules, which creates a sound wave as you speak.

Multi Pattern

When a sound engineer first starts using microphones in a studio, they will first notice that different microphones have different “patterns” or directionality when used near a sound source. The cardioid pattern, for example, has maximum pickup at a direct line from the source, while the microphone’s sensitivity falls off exponentially the further away from the source it is. Multi-pattern microphones have two or more patterns, each with different directionality characteristics.

Bass

Bass microphones are built to capture all of music’s low pitches and volumes. With all of the music apps available nowadays, it’s possible to boost the bass of your recordings artificially using software, but a bass microphone will manage it all by itself. There are several things to consider if you’re in the market for a bass microphone. There are vocal microphones for live performances, but if you have a band or band project and you’re auditioning or recording bass, you’ll need a slightly different microphone that can pick up bass tones and record them faithfully.

Shotgun

Shotgun microphones are one of the most versatile pieces of recording kit available, but they are also notoriously hard to figure out. Aside from the technical considerations, there are other factors to consider, such as the presence/absence of phantom power, battery or phantom power, cardioids, omnidirectional, and hypercardioids.

Boundary

Boundary microphones are typically used for acoustic recordings, meaning the microphone has a thin, flat housing that acts as a diaphragm. This allows it to pick up only the sound directly in front of the mic, not the sound coming from behind it. The idea is that it can be used to pick up a clear signal, such as a performer’s voice, or as an added bonus, pick up a sound that is a byproduct of the performance, such as applause.

So, a microphone is a device that takes sound in the form of a vibration picked up by its diaphragm and converts the sound waves into electrical signals. The audio signal can be amplified and transmitted over an audio cable to other components in a recording studio.

Main, Photos Everywhere

Black and White vs. Color Photographs: What to Consider

Black and white versus color photographs may seem like a basic decision. Still, there are some important differences to keep in mind if you’re looking to create the best visual experience for your audience. Color photography is vibrant and full of life. In contrast, black and white photographs are muted and mysterious.

Here’s What To Consider In Black And White Photographs:

  • Take Note of Images That Provide High Contrast. 

The contrasts between light and shadow, dark and light, black and white, and thick and thin are elements to paint within photography. Black and white photographs provide much more room for interpretation than color ones. Since black and white are usually applied during post-processing, you can play around with the contrast much more than with color images.

  • Use A Small Aperture and As Low an ISO As Possible. 

“When you shoot in black & white, you often shoot with a faster shutter speed, which means you need to use a lower ISO. This sometimes means a higher shutter speed and a lower ISO setting, yielding freezing action shots of moving objects.”

  • Check the Camera’s Histograms.

A histogram is a graph that shows the distribution of data values within a range. Camera manufacturers often show histograms during video recording and shooting in-camera. This can be useful when reviewing your footage because you can see where the highlights are and where they are clipped.

  • Monitor Light Sources in Street Photography. 

Street photography is a genre and form of photography that focuses on capturing candid photos of everyday life. While street photography can take a variety of forms, it’s important to understand how light affects your photos.

Here’s What to Consider In Color Photographs:

  • Look for A Pop of Color. 

Using color is a quick and easy way to add visual interest to your images. Look for colorful objects, flowers, vegetables, or anything that pops against a neutral background to give your images depth and dimension. Color photographs are one of the best ways to add life to your work. They can convey an emotion, tone, mood, or feeling. Color adds more to your photograph than white, black, or shades of gray. 

  • Color To Create An Abstract Photo. 

Color plays an important role in creating any photograph. For example, a photo with strong color can help the viewer focus on the image’s main subject. On the other hand, other colors may distract the viewer from the main subject. For example, in a black and white photograph of a sunset, the orange color presented in the setting sun may distract viewers from looking at the clouds or the details of the sky. Colors in photographs are merely decorative and do not have much to do with creating an artistic photograph. However, the colors you choose can be used skillfully and creatively to create a sense of depth and meaning in your photos. When choosing a color for your photograph, consider the mood you want to create, what the colors are in the rest of the image, and how the colors will blend with the colors in the rest of the image.

  • Bright Colorful Backgrounds. 

Color is one of the most powerful emotional tools in your photos. It can elicit happiness, excitement, sadness, fear, calmness, and anger. It can also convey information about the subject. For example, blue indicates tranquility, white warmth and cleanliness, and green freshness. However, color can be the bane of a photographer’s existence. Color is difficult to control, and different color file formats have other color profiles. Color profiles affect how colors are reproduced on paper, computer screens, and in printing. You can control color profiles on your computer monitor, but on output devices, the color profiles are usually baked in and cannot be changed.

  • Use The Color Wheel to Obtain Contrasting Colors. 

The Color Wheel is a great tool used to determine whether a photographed object or scene will properly reproduce in varying colors. The Color Wheel got its name because it’s designed in the shape of a color wheel. The wheel comprises three primary colors—yellow, blue, and red—and nine secondary colors—green, orange, pink, purple, brown, black, blue-grey, green-grey, and white.

Black-and-white photography is often perceived as more authentic and more honest. However, color photography provides more beauty and depth to an image, bringing a new level of interest that can be lost in black and white photography. Therefore, instead of choosing one over the other, photographers can choose to incorporate both in their pictures, providing the perfect mix of authenticity and interest.

Creative Writing, Main

Edit As You Go, Or All Once Done: What To Know

Editing one’s work as one goes along allows for the possibility of catching mistakes before they get too far along. However, this method has some drawbacks. With the first draft being finished at the end of the day, it can be difficult to get back to it once a week and continue editing. Also, as one progresses, revision becomes more and more difficult since it’s harder to track down mistakes and fix them on the fly.

Many of us are familiar with software like Scrivener, TextEdit, and NisusWriter, which lets us continue working on a project while leaving the writing for later. This lets us experiment with a scene or chapter without worrying about disrupting the storyline.

To ensure you get your edits done, you may have to use a certain number of tools. Editor, spellcheck, grammar checker, and a thesaurus are just a few. But more importantly, you’ll need to know how to use them and how to make the most of them. Presented here are a few points you should know about using grammar and spellcheck.

There are two basic approaches to writing: edit as you go (or “EAG”) and edit your work once you’re done. Some writers use EAG because they believe it’s faster, but in reality, it’s not. The reasons are many and varied.

When you’re writing a book or article, you’re not limited to just one specific point of view — you can give your readers many different ways to experience your story. Making choices about how you write about your story doesn’t mean you should limit yourself to what you think is the “best” way to write. No single way will work for everyone.

If you are a writer, you know that every word needs to be carefully thought out. When it is time to edit or post a piece, you need to be able to look at it through a different lens. You need to know that you are writing, not editing. You need to write as you go. You can get really good at this, but you will have to make adjustments along the way. Sometimes you will stumble over a word and wonder if you can fix it. Other times, you will have to write the entire thing over again. If you are writing as you go, you will know what you need to do, and you can edit or rewrite as you need to.

There are lots of different ways to write; some are more formal, and some rely on a more informal style. There are lots of websites that offer advice on how to be a better writer. Some of it is likely to be good and some not so much, but the point is, you can find a lot of content about writing. I have been writing since I was a kid and have learned a lot along the way. The thing is, there is no way to become a great writer from books, as there is no guarantee that you will have the same level of talent as the writer you are reading about. 

Editing your work once you are done is a crucial step in any writing process. In fact, the importance of editing for any writer cannot be overstated. It is so important that some writing guides even recommend getting your work edited before you submit it to a publishing house. It could be that the editor is offering valuable advice on the editing process or that some writers have a bad editor, and their work would benefit from an extra pair of eyes. 

Editing is a monumental challenge for any writer, and there are many ways to approach the job. If you’re a “copy and paste” kind of person, you can wait until you’re done and then do your final touches from a word processor. Some prefer to work on individual sentences and paragraphs as they go. The biggest advantage to this approach is the speed it lets you work and that you have a record of your progress.

Creative Writing, Main

How to Start Writing a Blog

Blogging is a great way to get your online content out there and start building up a following. With that in mind, this post will teach you the basics of starting a blog. You will learn the steps to take to build a solid blog that will allow you to increase your traffic and generate revenue.

As we live in a society, people are categorized in various boxes. Some people are dreamers while others are artists. There are comedians, musicians, writers, actors, painters, directors, readers as well as critics. Some people become independent entrepreneurs, while a few others focus on building their small businesses. 

Writing is a hobby that many people want to get started with, but a lot of them find it difficult to start. I know this because I struggled with it for a long time. Hence, I found some things that worked for me and I’m going to share them with you.

It’s easy to get started with blogging. You just need a blog, some writing skills, and a little desire to start posting about your thoughts, experiences, and anything else that you wish to add to the world of words. However, I would like to tell you that becoming a blogger does not come easily. There is so much that you will have to learn, including how to write, structure and format the posts in the best way possible, and run a website.

For many, the idea of starting a blog may seem quite daunting and intimidating. But if you’re just starting out, there are a few things you should know. First of all, start with something simple. A clean, feature-light blog is a great place to start. Make your content easy to read as it’ll make it easier for the readers to understand. Secondly, don’t let the big idea scare you. You don’t need to write a novel right away. Start with one, or at most two posts. You can always go back and add more later if your muse strikes. And third, if you want to make your blog successful, it’s important that you have a social media presence. You can add a widget button to your blog to do this.

Blogs are a great way to share your thoughts and opinions. But how do you go about starting a blog and writing your first post? There are several steps involved in starting a blog, but you can start by getting your website up and running. Once you’ve got your site up, choose a topic you’re passionate about. This type of blog is called a one-person blog, and it’s a great way to share your thoughts, feelings, and experiences.

Writing a blog is a lot like writing a book, except that it’s online. You might be thinking that it’s too hard to start writing a blog. However, if you follow the steps in this article, you will be on your way to writing a great blog. Although blogging is not a hard skill, it does take time and effort. You may want to keep in mind that this is something that you are going to do daily for the foreseeable future. So, it is important that you love what you do.

If you’re reading this, chances are you’re interested in starting a blog and want to know how to go about doing it. But if you’re like most authors, you may not be sure about where to start. If you’re interested in writing fiction, you may want to start a story blog to keep you on track and develop your craft. If you’re writing nonfiction, you may want to start with a collection of tips and advice or start a blog about a topic that interests you. 

There are quite a few things that you’ll need to start writing a blog, but one of the main things that you need to keep in mind is to have a goal. Before you write your first post, you should know exactly how you want to use it. You can use your blog for any purpose, but if you’re serious about writing, you’ll need to start with a specific goal.


Creative Writing, Main

Pros And Cons of Traditional Publishing

Traditional publishers are coming up against a major problem: a huge gap between the amount of money they are making and their spending on marketing. When it comes to mastering the art of writing, most writers have no idea how to go about it. They think that writing is about solving a problem, but this is not the case. It’s about thinking— thinking about your readers. Think about what you want to say. This requires a point of view. That is where your voice will come from. 

This article will explore the pros and cons of traditional publishing and explain why traditional authors can be helped by working with a book publishing company. 

Pros

  • You will have a literary agent support

While it’s easy to think of the book publishing industry as a monolithic entity, it’s far more complex and varied than that. There are many different options for getting your book published, from independent authors to small presses to major publishers. And in many ways, that’s what makes it fun as a writer. Many authors are thinking of publishing their works with traditional publishers and it’s a good idea to do so. But the way traditional publishers work is different from the way self-publishing authors do things. We will discuss this and give you some tips and advice.

  • You can have a publishing team

There are many things to consider when choosing a publisher for your book. However, there are a few things that matter more than bringing a manuscript to life. Anyone who has picked up a book can attest that writing a book is tough. The process is constantly evolving, from the brainstorming and drafting process to the final edits and publishing. For the author, the good news is that most publishing companies these days allocate the proper number of staff to complete the book well in advance. This can give the author a sense of security that their book is well-handled from start to finish.

  • You may get cash advances

With many aspiring authors turning to self-publishing to bring their work to publication, there are a lot of misconceptions about how the process works. The reality is that those who sign with prestigious publishers will likely get paid in installments over the course of a year, not all at once. 

Some authors choose to take this as a sign that they should quit writing and go find a good job, while others believe that it is absolutely necessary to live comfortably while writing a book. 

Cons

  • You may get lower royalty rates

Over the past decade, the self-publishing market has grown quite a bit. So much so that now there are countless official and self-published authors competing for the same readers. With that in mind, how do traditionally-published authors fare when compared to their self-published counterparts? The answer is, unfortunately, not as well. If you are an author who wants to publish your book, there are two ways to do it—traditional and self-pub. Self-publishing is the easier of the two, but you may be surprised how little money it actually makes.

  • You may get loss of creative control

Many writers today are afraid to put their work out there. They’re scared to send their manuscript to publishers, or they’re too timid to release their work through traditional publishing routes. Instead, they choose to self-publish their work, which many do not understand. When they hit their target audience, they will be bombarded with a flood of marketing messages, replete with sales pitches, that can often make it difficult to sell their work.

All too often, the publishing industry, traditionally a realm of books with a traditional cover, paper cover, and even a traditional cover, is becoming a monolithic corporation with a single label on both the cover and the back cover, and a single model of how books are sold to the consumer. There is no longer any room for individuality, and a writer is lucky to have any say in their book’s title, back cover blurb, or even where it will be stocked in bookstores.

Creative Writing, Main

Best Software to Use for Writing

We can’t always rely on just the software when it comes to writing. You need to write in various ways and with a variety of tools to produce better work. There are some great software applications out there that are perfect for the purpose. When you’re writing a blog post, you would want it to be as good as possible, and the ideal way to do that is with the right software. Fortunately, there are a bunch of good programs out there, but we will focus on a few. So here are the best softwares to use for writing:

Google Docs

If a lot of experienced people say that you need to use Word (or Google Docs) for writing, you should take their advice seriously. Using one of these services is far more efficient than using Word because it allows you to write, edit, and edit again without having to save and re-save your work. It also allows you to view your document in its full glory while still having the ability to make handwritten notes, which makes editing tasks a cinch.

Freedom

Freedom is a writing app that lets you free your mind. You don’t need to worry about writing with a specific app, as you can use any text editor, and Freedom will do the rest of the work for you. You can also do different things with your writing, like making it readable to the human eye, and so on. This app is the easiest way to turn your manuscripts into beautifully printed books.

Publisher Rocket

If you’re a writer, or you want to become one, chances are, you might have thought of writing for your own blog. But you might not be sure about where to publish your work or what software you should use. Well, there are many writing tools out there, some free, some expensive, some good, and some not so good. But there’s one that stands out above the rest: Publisher Rocket. Publisher Rocket is a combination of blog and publishing tools. It’s an easy-to-use blog that takes care of all the technical details involved in turning your posts into beautiful blogs on your website. In addition to blogging, Publisher Rocket is a publishing tool that lets you publish your blog posts efficiently.

Evernote

The Evernote app has been available on Android for a while now. Since the app is free, it is a great way to take a jotting and organize them into one place. I like to use Evernote to keep a diary on my phone so I can look back on it using my PC or my mobile and add more information to it.

Apple Pages

Apple’s Pages app is a mobile word processor that lets you create and edit simple documents, spreadsheets and presentations. It supports a number of formatting styles, including Markdown, and a simple yet versatile text editor. The app also includes a host of presentation-related features, such as the ability to easily add in images and embed videos, similar to what you’d expect from a program like PowerPoint.

Adobe Creative Cloud

Alongside the launch of the new Creative Cloud desktop app, Adobe has announced the launch of new tools that bring the power of Adobe Photoshop and Illustrator to more of your devices and cloud services. It is Adobe’s professional and aspiring writer products suite. There’s Adobe’s Creative Suite for professional writers, which includes products like Photoshop, Illustrator, and InDesign. A few months ago, Adobe updated Creative Cloud to include a new photography app called Photoshop Mix, which lets you apply real-time adjustments to images in the same way you might adjust them in Photoshop. The new app is on by default, and I really like it.

It is important to remember that the best software for writing doesn’t always mean the best software for you. You’ll need to evaluate the individual needs of your writing process and choose a package that best fits your goals.

Main, Photos Everywhere

How to Photograph Your House

Photography is an incredibly versatile and powerful tool and can be used in several different ways. Many photographers take reasonably beautiful photos of their homes but are unsure about how to take the perfect shot. People often ask us how to take pictures of their house, but aren’t sure what kind of photos they should be taking. If you dream of taking photos of your lovely home, we have got you covered!

Preparing your House

Clean and Declutter

Before you even think about grabbing your camera, the first step to photographing your house is to ensure it’s spotless. A clean and clutter-free environment not only makes your home more visually appealing but also allows potential buyers or viewers to envision themselves in the space. Start by organizing each room, removing any unnecessary items, and decluttering surfaces. Pay attention to details such as neatly arranging pillows, folding throws, and clearing countertops. A well-maintained and tidy home not only looks more attractive but also translates into more impressive photographs. If you discover any glaring issues like indoor pests in the process of cleaning, then consider consulting professionals similar to Pest Control Experts Aptive for a comprehensive solution.

After investing in deep cleaning your home, the last thing you would want is to deal with pests like raccoons or squirrels roaming around and causing havoc. Not only can they dirty the space, but they also pose health and safety risks. Therefore, to maintain a clean and inviting environment, it’s crucial to engage experts who specialize in raccoon or squirrel pest control services (or similar offerings). These professionals can efficiently remove pests from your property and implement preventive measures to ensure they don’t return.

Frame the Scene

Beyond cleaning, the next crucial step in photographing your house is mastering the art of framing. Experiment with various angles and perspectives to find the most flattering views of each room. Utilize wide-angle shots to capture more of the space and showcase the flow of your home. While doing so, be mindful of composition-position furniture and objects to highlight the best features of each room. Consider shooting from corners to add depth and dimension. When framing exterior shots, showcase curb appeal by capturing the front of your house from a slightly elevated angle. Remember, the goal is not just to document your home but to present it in a way that captivates and intrigues potential viewers. Taking the time to find the perfect frame for each shot can make a significant difference in the overall impact of your photographs.

Finishing Touches

After cleaning and optimizing the lighting, focus on adding the finishing touches to elevate the overall appeal of your home in photographs. Pay attention to small details like fresh flowers, neatly arranged furniture, and tasteful decorations. Make beds with clean and inviting linens, and consider adding a pop of color through strategically placed accessories. In outdoor shots, ensure the lawn is mowed, and any exterior features are well-maintained. If you have a garden or patio, arrange outdoor furniture in an inviting manner. The goal is to create an atmosphere that resonates with potential buyers or viewers. By investing time in these preparation steps, you’ll be well on your way to capturing stunning photographs that showcase your house in its best light.

Tips for your House Photography

While you can shoot anything you want, there are some basic things to keep in mind to make your house photo a success. Check out the following tips on how to photograph your house:

  1. Use natural light. It’s harder to get the perfect shot by shooting in artificial light. Human vision is far more sensitive to light than artificial light, so our eyes will pick up more natural light than artificial light. Shooting in natural light is less stressful, which means you have more energy to get the perfect shot, and you can get the perfect shot more often.
  2. Look at it through the lens of perspectives. It’s a great place to start when you’re considering how to photograph your house. To get the best results, it’s important to understand the purpose of photography. It’s an art form that is used to create art. The art of photography is not merely a way to capture a moment or a moment; it is a way of seeing and understanding. It is a process of looking at things through an often abstract lens. Home photographers are often particular about setting up and photographing their subjects. For example, a standard way of setting up a house is to shoot through glass, with a doorway as the main feature. However, if you want to create a gallery of your house, this can be limiting.
  3. Take photos one room at a time. Although most of us probably have a huge backlog when it comes to preparing our homes to be photographed, there is no denying that the act of photography truly is a labor of love and, in a lot of cases, the amount of thought and devotion that goes into the making of the photograph is worth its weight in gold. With this, have you ever wondered how photographers create the amazing images you see in magazines and on the web? The answer is simple: they simply photograph their way through their homes, one room at a time.
  4. There’s always a time to shoot wide as well as a vignette. If you are a photographer, you have probably heard the term ‘vignette’ thrown around in conjunction with landscape photography. A vignette is a small picture that is framed within a larger image. It can take the form of a circle, an oval, a square, or any shape that is shaped like a box. Often, the smaller picture is placed within a larger image to accentuate the smaller one. You’re probably familiar with the term vignette, but have you ever thought of using it in a different context? We’re not talking about a scene that’s set at sunset, which tends to be a perfect example of how to shoot a vignette, but rather a photo that’s shot from a super wide-angle and is titled as such. Get creative with your shots; add some vignettes as you take them.
  5. Get a bit lower and watch out for some reflective surfaces such as mirrors. More and more, people are taking the advice of photographers and taking photos of their homes. Homeowners will often take photos of their rooms and then post them online to show off their homes to friends and family. When taking room shots, get as close to the subject as possible, but don’t get too close. This will keep the room in focus and make the space feel smaller. Remember to shoot from above for a better perspective.

The saying “a picture is worth a thousand words” is true – and it applies equally well to home renovations. This type of process can be a huge milestone in the lives of a homeowner, and taking photographs can be a nice reminder to see how far you have come. For example, regardless of whether you change your flooring, repair your concrete patio (with the help of companies like https://concretecompanycharlottenc.com/), or spice up your interior, taking photographs is a definite must.

A significant number of people start their home improvement projects by taking pictures of the old ones and documenting everything they need to know. This gives them a better idea of where they stand in terms of texture, dimensions, colour scheme, natural light, etc., and what they would need when starting a renovation or home addition project to stay on theme and give consistency to the home.

Others learn to photograph their house daily to track their progress, and others still can get valuable insight into their project by photographing it throughout the different stages of development.

So, what are you waiting for? Start taking photographs of your home today!